
Documenting Your Cybersecurity Journey: A Simple Automated Blog Workflow Using GitHub
Introduction: One of the most important aspects of building a career in cybersecurity is documenting your journey. Whether it’s through LinkedIn posts, Instagram updates, or blog articles, sharing your experiences and insights can help you grow and inspire others. Today, let’s explore how you can cr...
- Author
- Hassan AL ACHEK
- Published
- MAY 13, 2026
- Reading time
- 4 MIN
- Views
- 67 views
On this page08
- Documenting Your Cybersecurity Journey: A Simple Automated Blog Workflow Using GitHub Actions and GitHub Pages
- Introduction:
- Step 1: Set Up Your GitHub Account and Repositories
- Step 2: Build Your Website with Hugo
- Step 3: Automate with GitHub Actions
- Generate a Personal Access Token:
- Add the Token to Your Repository:
- Step 4: Publish and Enjoy!
Documenting Your Cybersecurity Journey: A Simple Automated Blog Workflow Using GitHub Actions and GitHub Pages
Introduction:
One of the most important aspects of building a career in cybersecurity is documenting your journey. Whether it’s through LinkedIn posts, Instagram updates, or blog articles, sharing your experiences and insights can help you grow and inspire others.
Today, let’s explore how you can create a simple, automated blog-posting workflow with minimal requirements using GitHub Actions and GitHub Pages. Ready? Let’s dive in!
Step 1: Set Up Your GitHub Account and Repositories
- Create a GitHub Account: If you don’t already have one, sign up for free on GitHub’s website.
- Create Your First Repository: Name it .github.io (replace with your exact GitHub username). Ensure this repository is public.
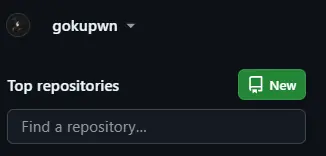
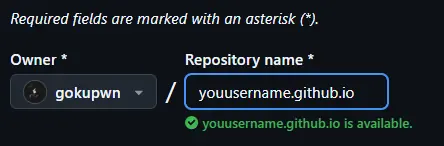
Create a Second Repository: Name it something like blogpost. This will host your blog content and workflow.
Step 2: Build Your Website with Hugo
We’ll use Hugo, a popular open-source static site generator, to create your blog. The beauty of Hugo is that you can write your posts in Markdown, and GitHub Actions will automatically convert them into HTML/CSS/JavaScript files.
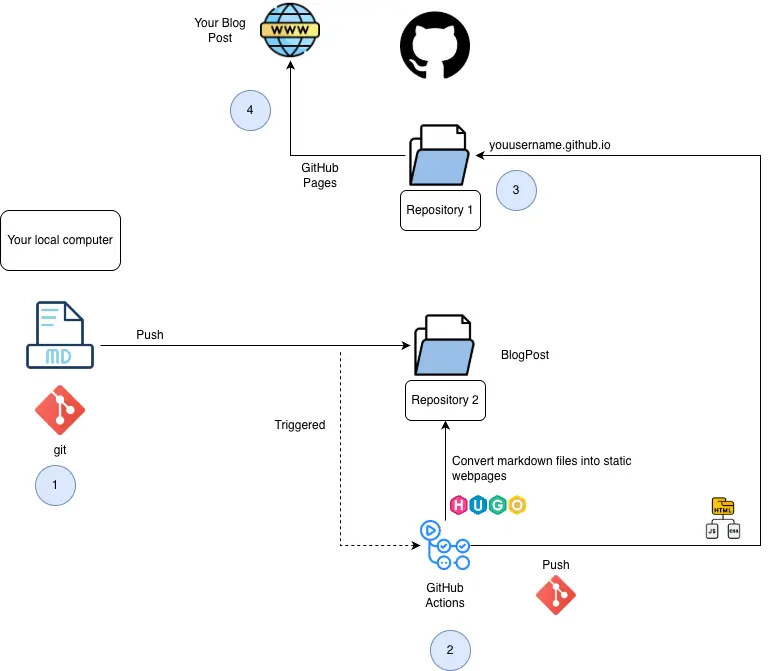
Here’s how to get started:
- Install Hugo: Download and install the appropriate version for your system from Hugo’s official website.

- Clone Your Blogpost Repository: Clone the blogpost repo to your local machine.

- Initialize a Hugo Site: Navigate to the blogpost folder in your terminal and run the following command: hugo new site

hugo new site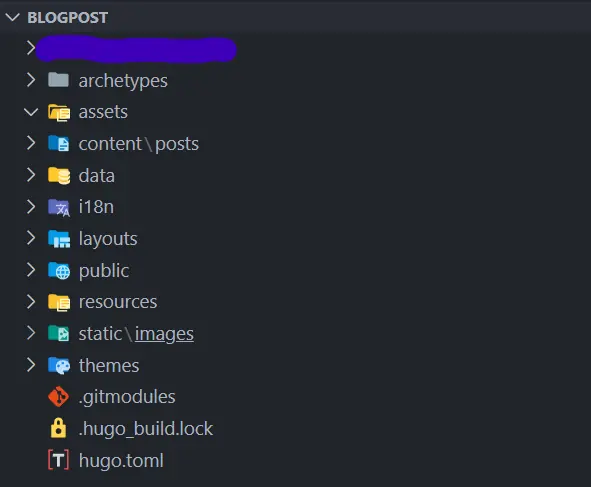
- Choose a Theme: Select a theme from the Hugo Themes Library. For example, to use the Ananke theme, run:
git submodule add https://github.com/theNewDynamic/gohugo-theme-ananke.git themes/Ananke- Then, add the following line to your config.toml file:
theme = "ananke"- Create Your First Blog Post: Generate a new post using:
hugo new posts/my-first-post.md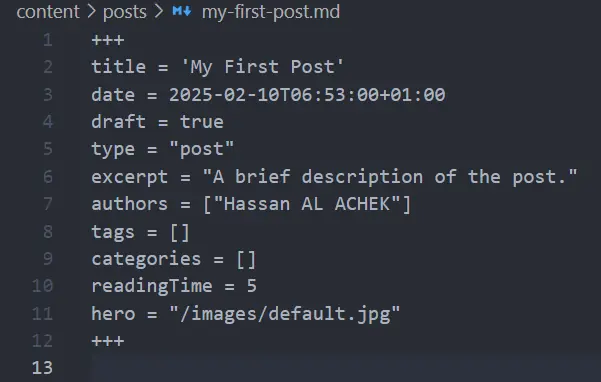
Step 3: Automate with GitHub Actions
Now, let’s set up GitHub Actions to automate the deployment process.
- Create a Workflow File: Inside the blogpost folder, create a .github/workflows directory. Add a file named deploy.yml with the following content:
name: Deploy Hugo Blog to GitHub Pages

on:
  push:
    branches:
      - main

jobs:
  build-and-deploy:
    runs-on: ubuntu-latest

    steps:
    - name: Checkout Repository
      uses: actions/checkout@v3
      with:
        submodules: recursive

    - name: Setup Hugo
      uses: peaceiris/actions-hugo@v2
      with:
        hugo-version: '0.125.1'
        extended: true

    - name: Build Hugo Site
      run: hugo --minify

    - name: Deploy to GitHub Pages
      uses: peaceiris/actions-gh-pages@v3
      with:
        personal_token: ${{ secrets.PERSONAL_TOKEN }}
        publish_dir: ./public
        publish_branch: main
        external_repository: yourusername/yourusername.github.io # Update this with your username
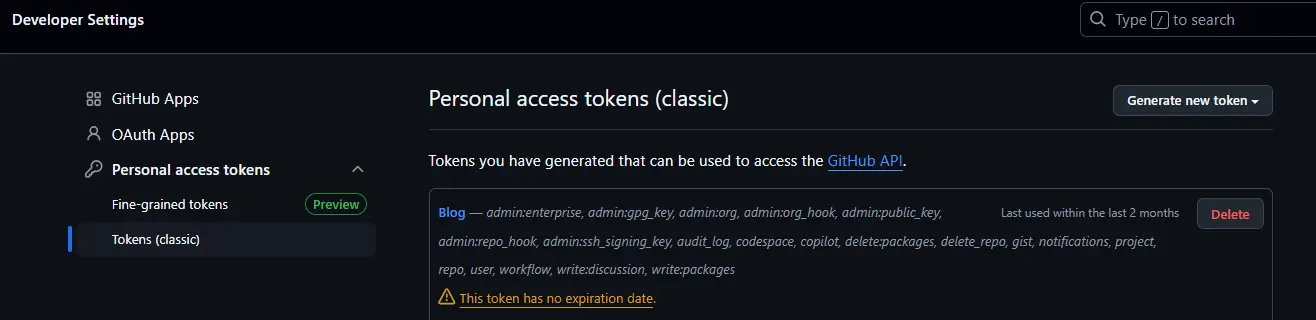
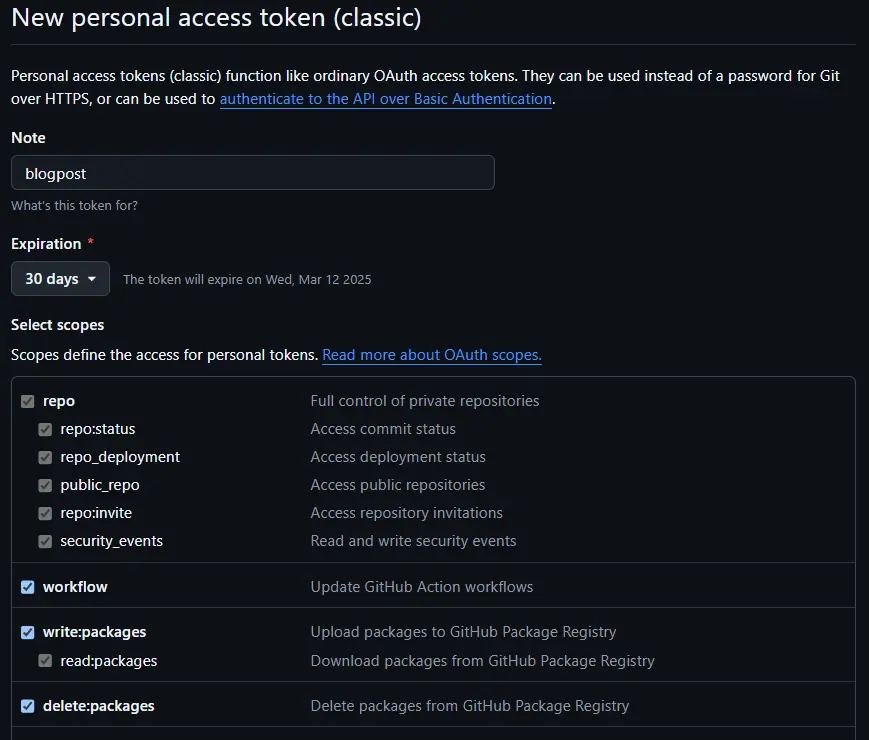
Generate a Personal Access Token:
- Go to your GitHub profile > Settings > Developer Settings > Personal Access Tokens.
- Generate a new token (classic) with all permissions and copy it.
Add the Token to Your Repository:
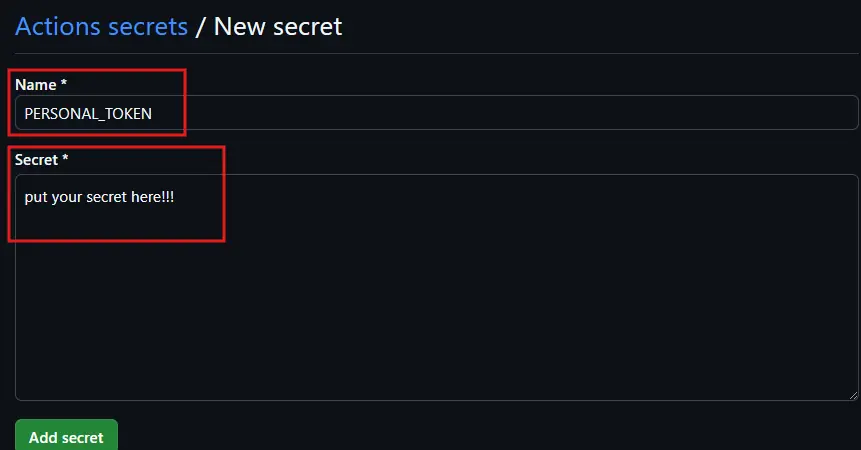
Navigate to the blogpost repo > Settings > Secrets and Variables > Actions.
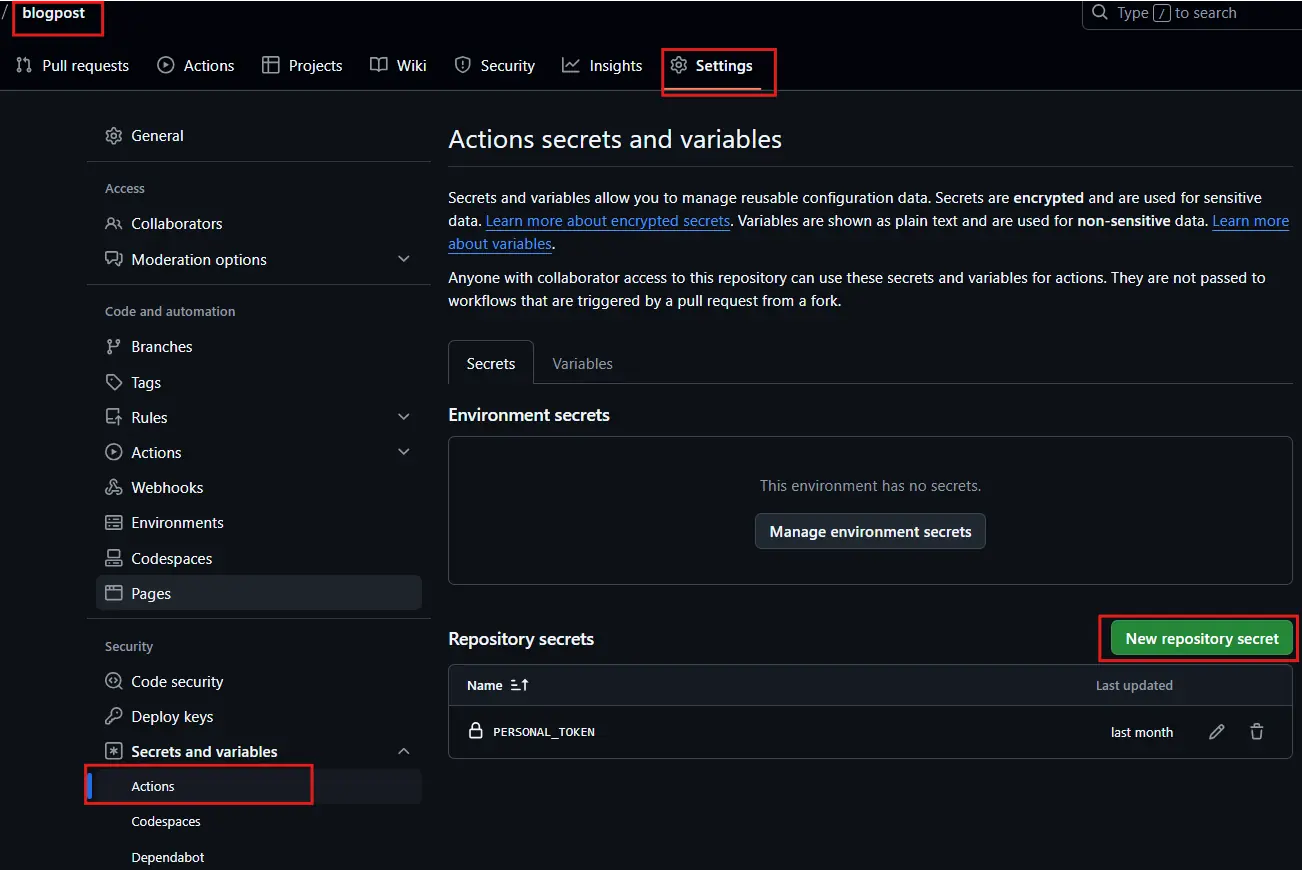
Click New Repository Secret, name it PERSONAL_TOKEN, and paste the token you copied.
Step 4: Publish and Enjoy!
With everything set up, you’re ready to go! Simply write your blog posts locally, push them to the blogpost repository, and GitHub Actions will handle the rest. Your static site will be automatically deployed to <yourusername>.github.io.
This workflow is perfect for cybersecurity professionals. It allows you to write in Markdown, maintain a backup of your notes, and effortlessly publish your content. Plus, it’s a great way to showcase your technical skills and share your knowledge with the community.
Give it a try and let us know how it goes!